Tutorial - Membuat Efek Zoom Foto 3D di Filmora
Anda ingin membuat foto zoom 3D diri Anda sendiri atau orang di sekitar Anda? Apakah Anda khawatir karena Anda hanya pemula dalam mengedit gambar sehingga tidak dapat melanjutkan ambisi Anda? Dengan Filmora, Anda dapat dengan mudah membuat efek zoom foto 3D dengan sedikit pengetahuan
Transcript
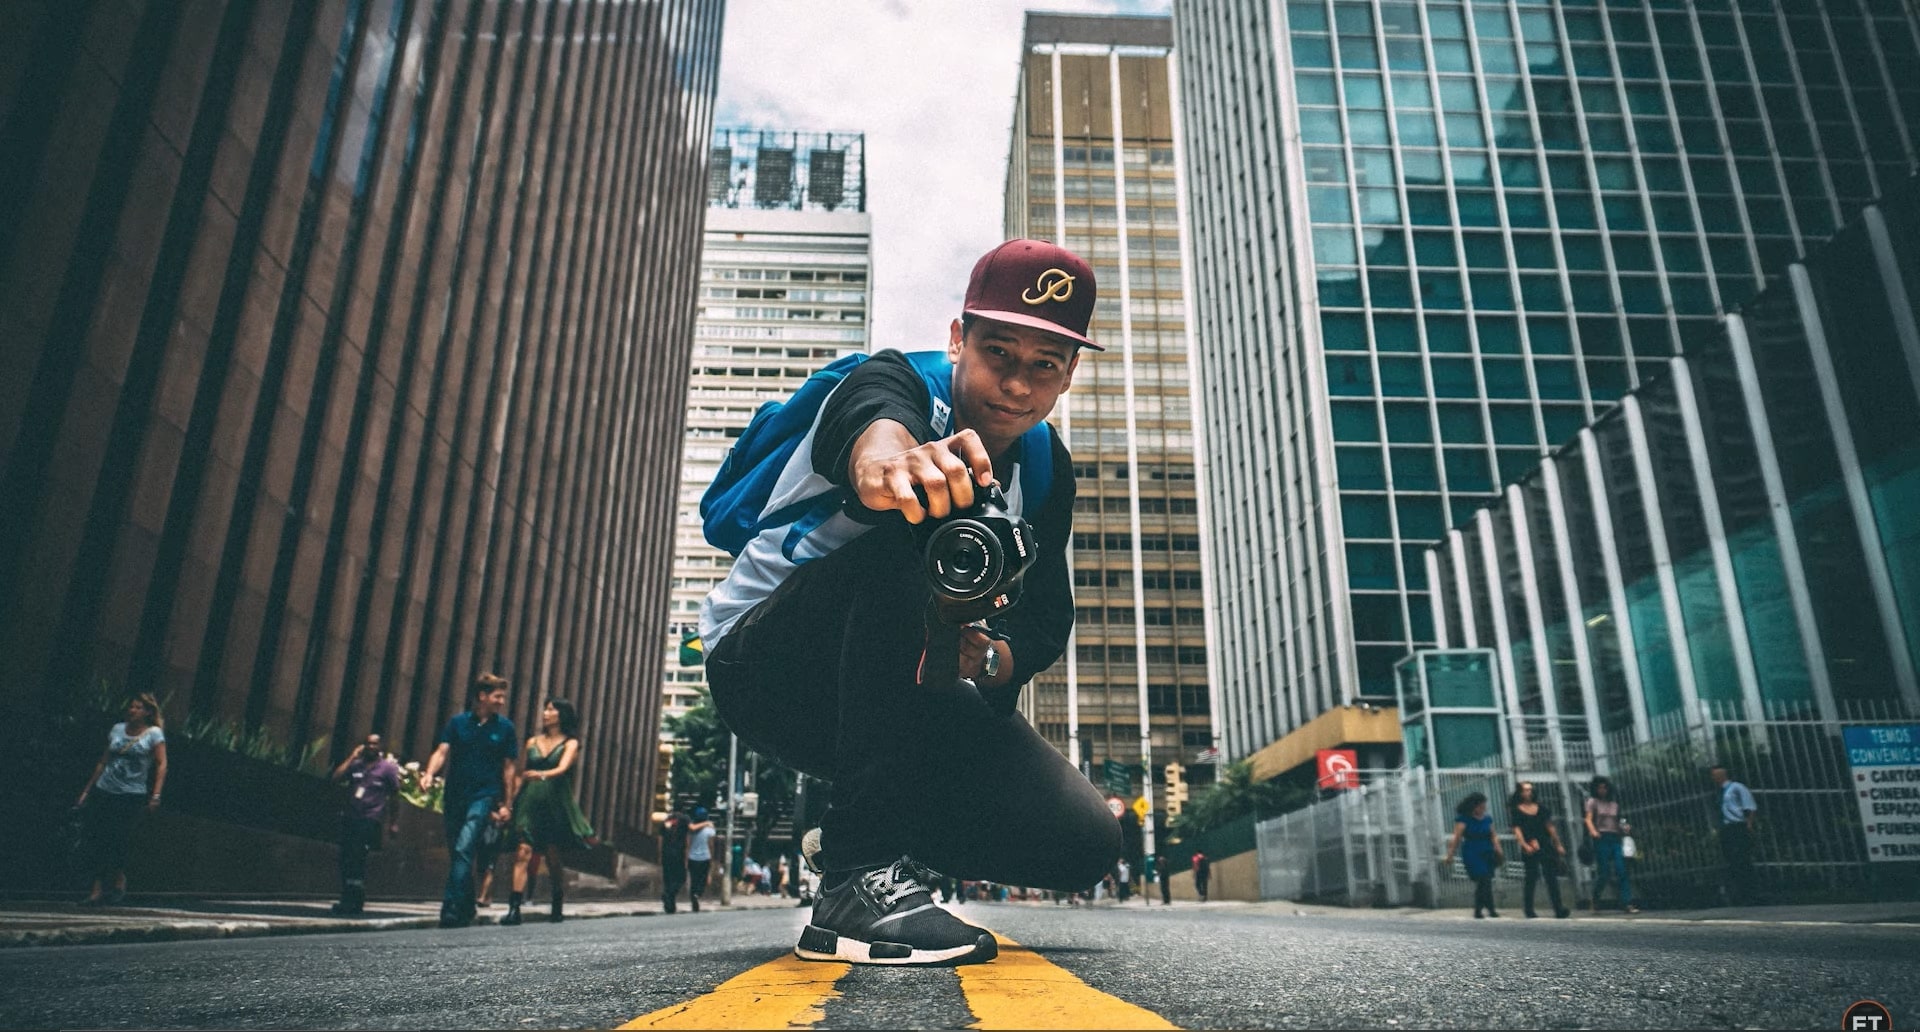
So, first of all, you need to take a photo of yourself. Now the first step is to remove yourself from the photo background, as well as remove the background from your photo. So basically, you have to generate two different photos.
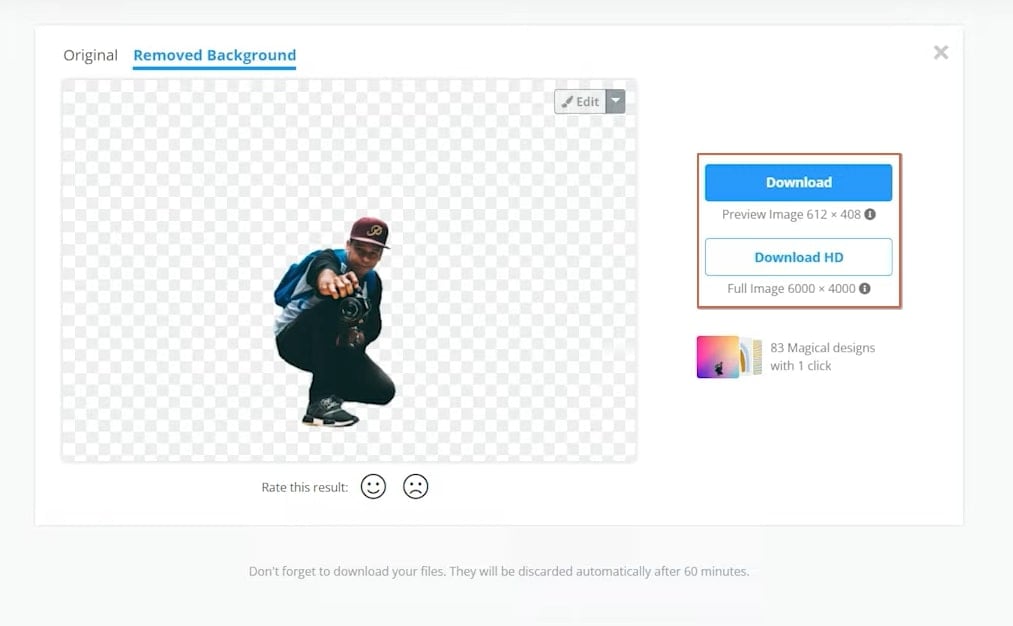
Open up a web browser, and go to “removebg.com.” Click on the "Upload Image” button and choose your photo. It will process the image and will automatically remove the background. Click on the "Download” button to download the image. It's going to be in a low resolution, but it's more than enough for social media.
But if you want a high-resolution image, then you'll have to purchase credits. Next, go to the website “theinpaint.com.” Click on the "Upload Image” button and select your original photo. By default, the marker tool is selected. You can use it to select yourself from the image, or you can also use the lasso tool.
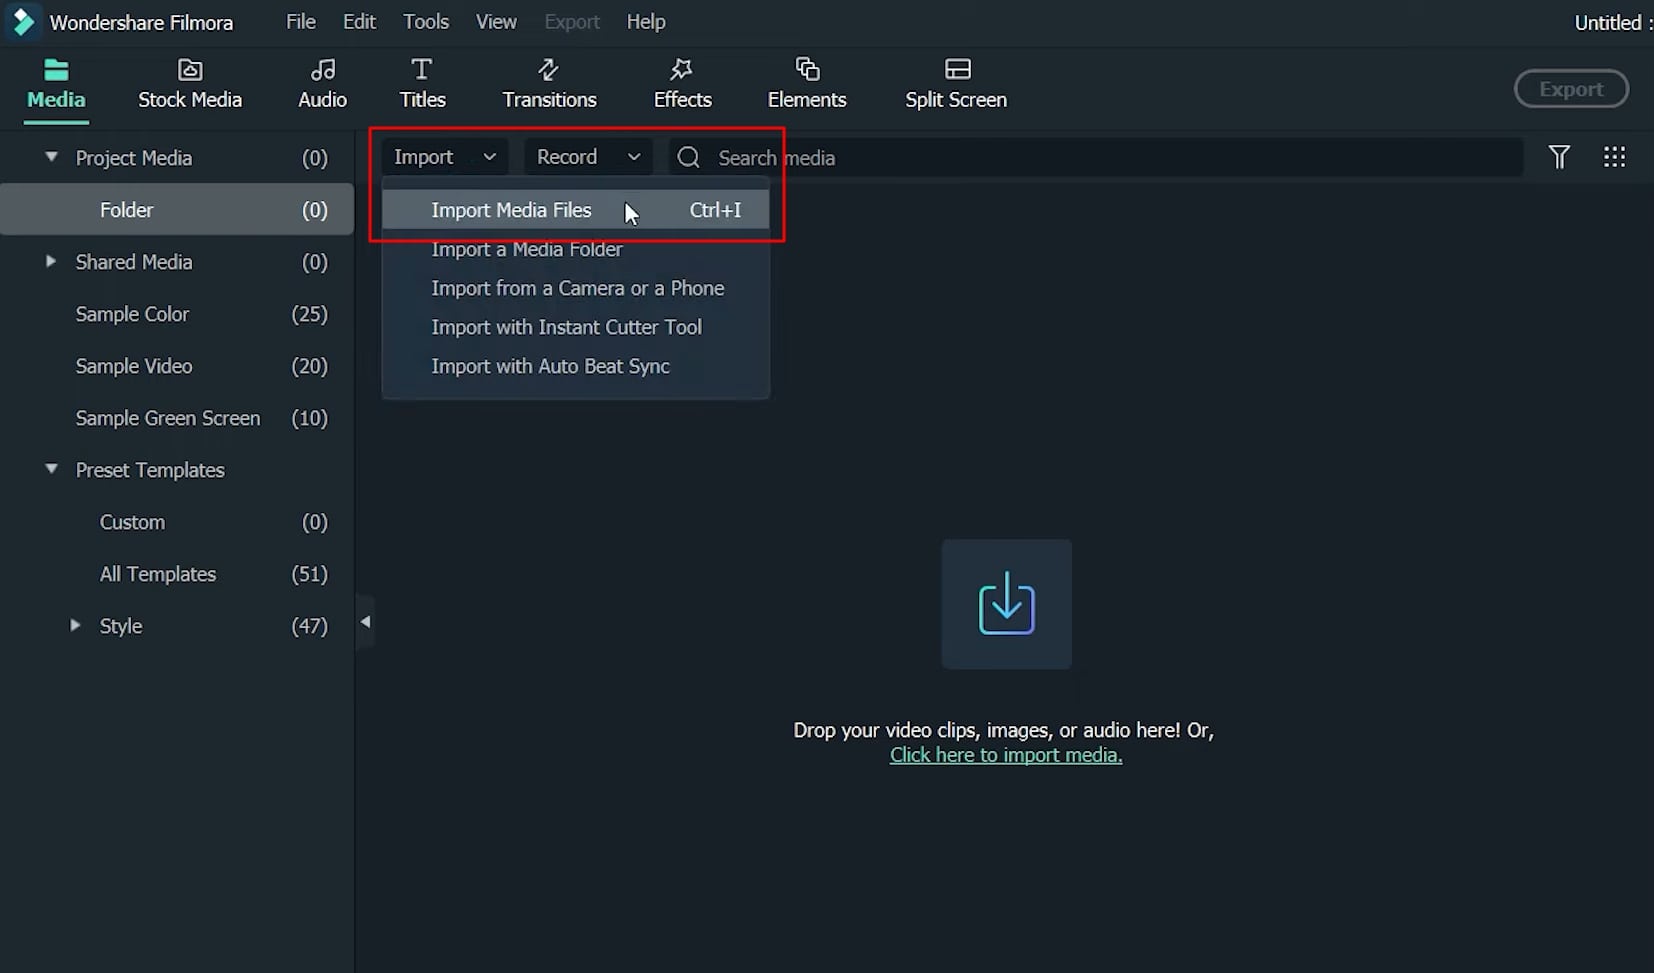
After selection, click on the "Erase” button, and it will remove you from the photo. Now click on “Download” and choose “Download Low Resolution.” The next step is to open up Wondershare Filmora. Click on “Import” and select “Import Media Files.” Select both of the downloaded photos and click “Open.”
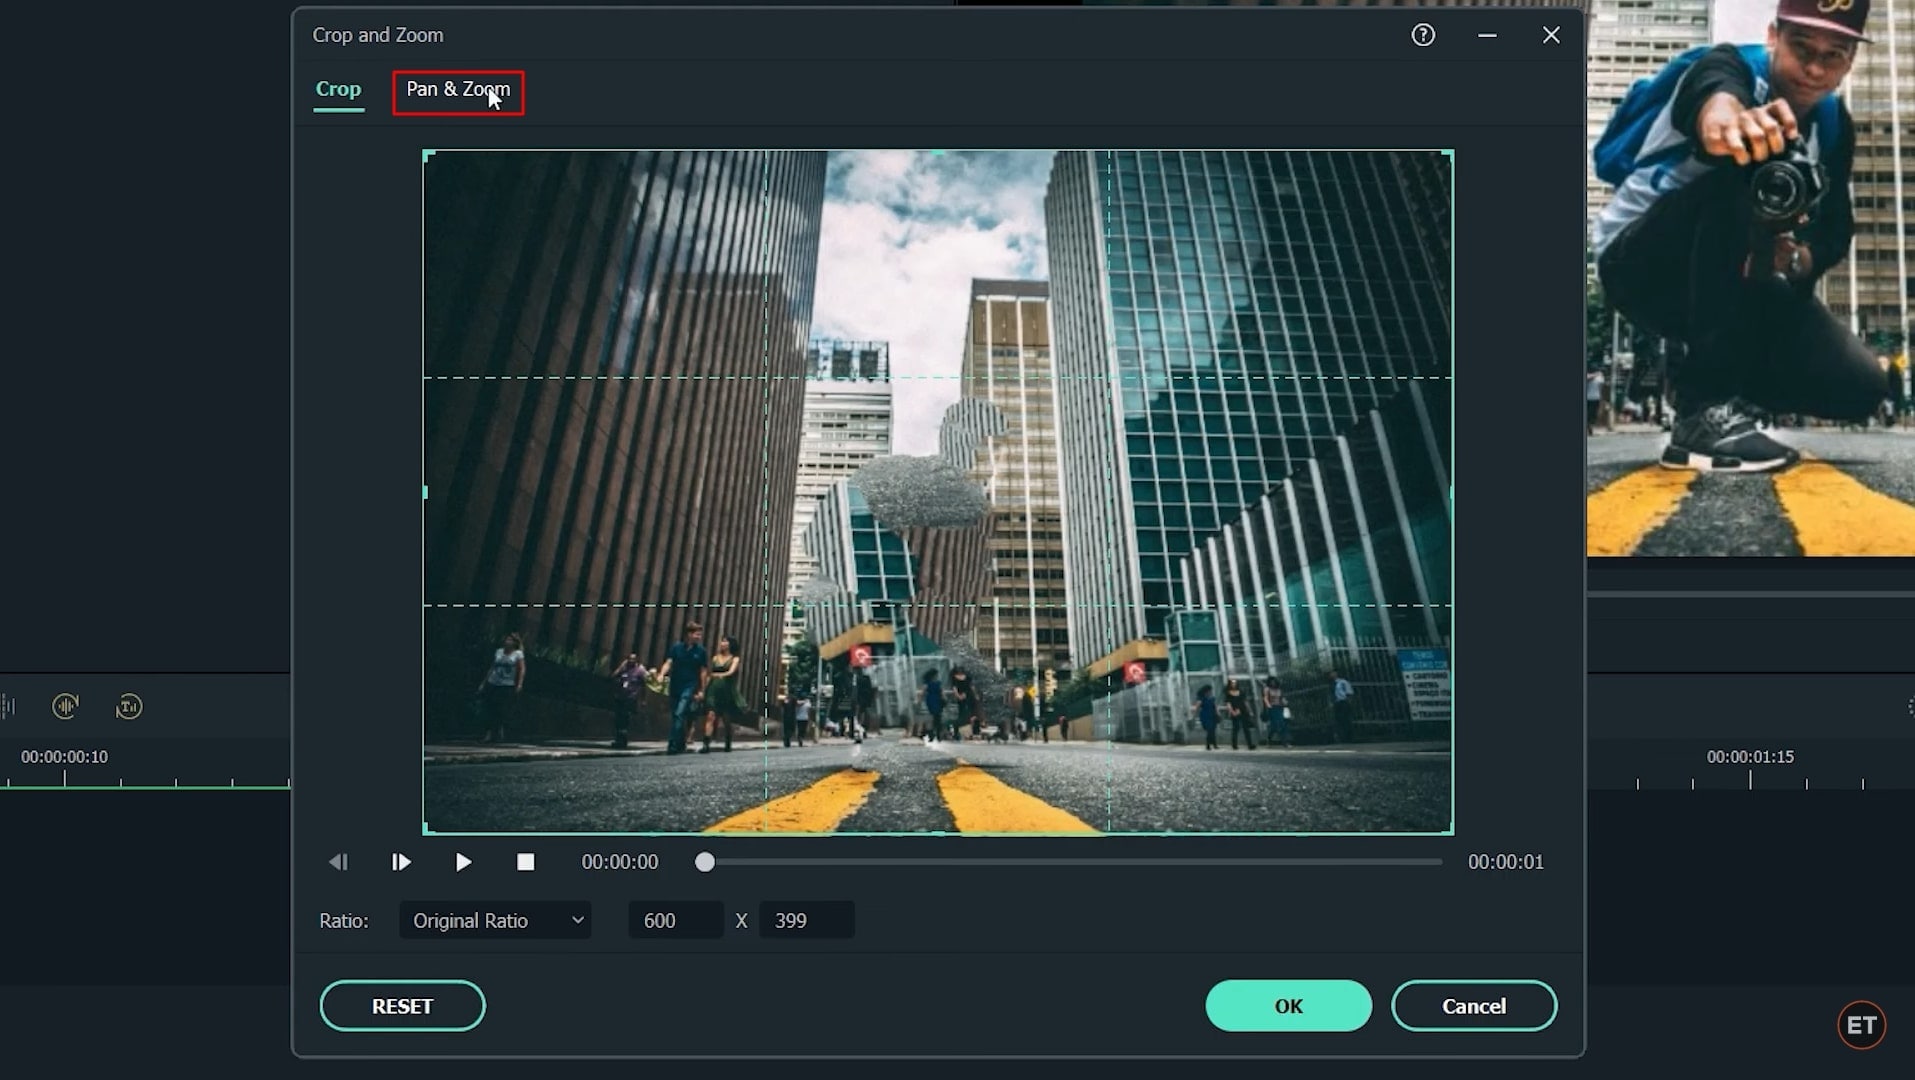
Drag and drop the background image onto the project timeline. Now drag and place your own image on top of it. Adjust the duration of both images by dragging from the right side and making it up to one second. Next, right-click on the background image, select “Crop and Zoom,” and then select “Pan and Zoom.”
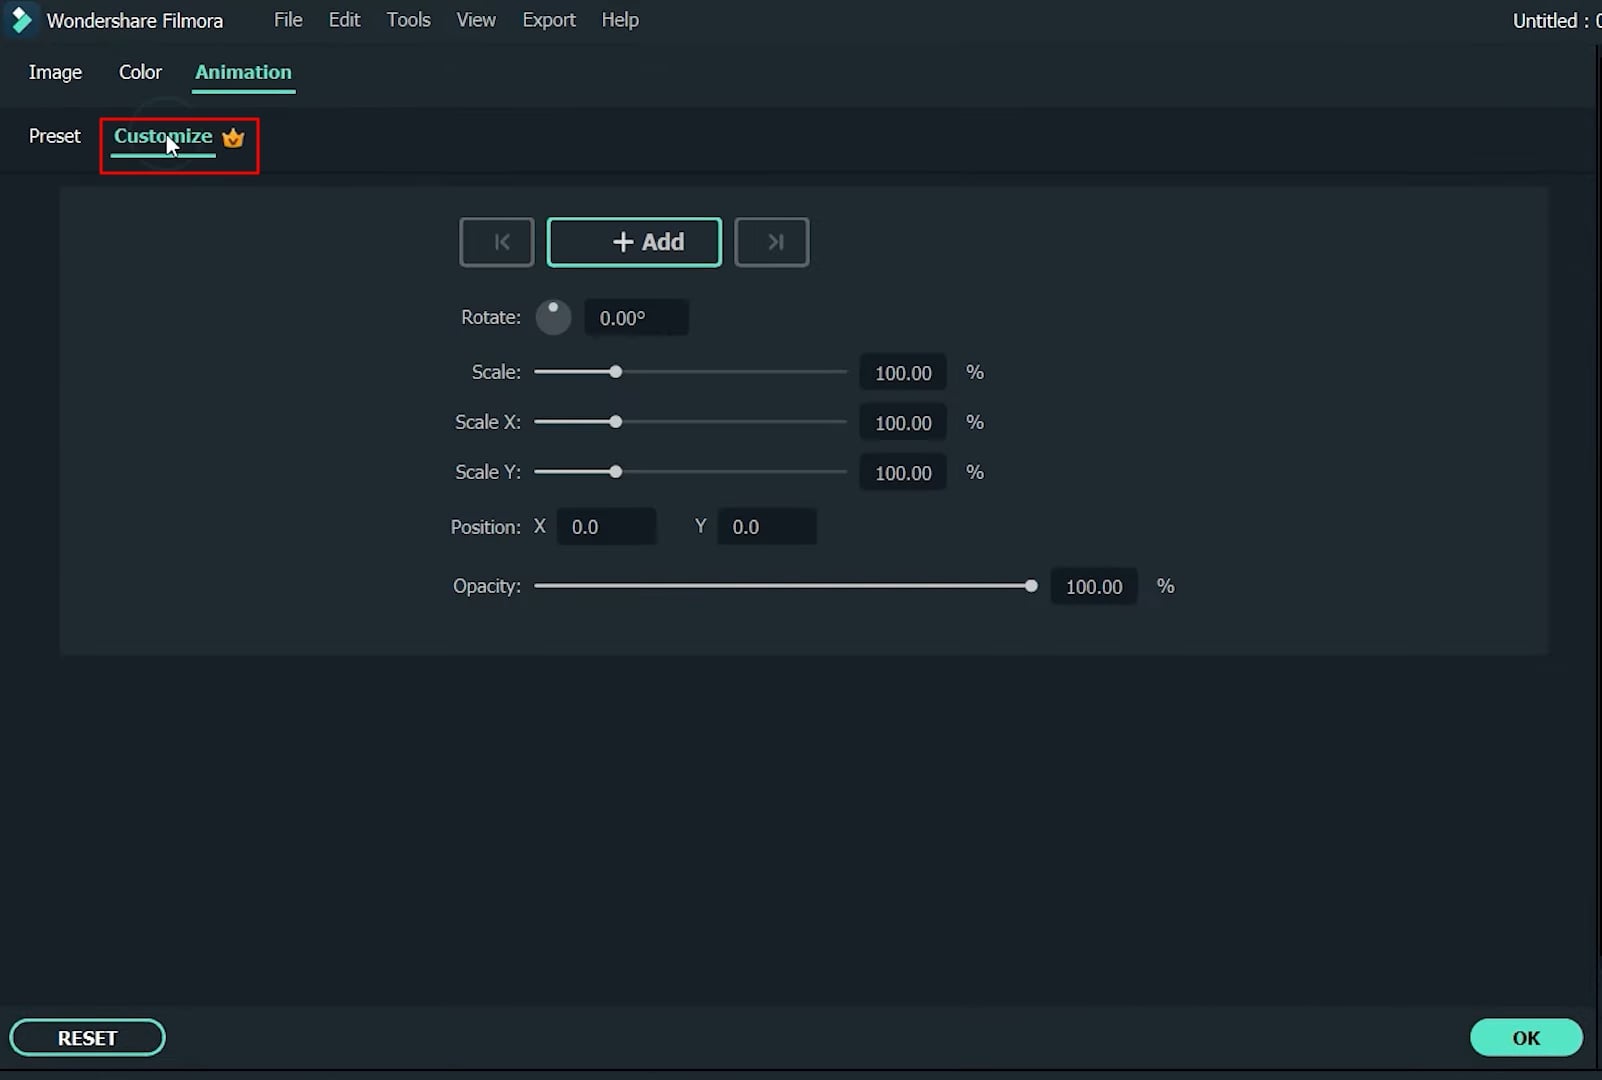
Now, leave the start box as it is and click on the end box, which is in red color. Adjust its size and, drag it to the corner, click “OK” to save changes. Now double-click on the second image of yours, go to “Animation," and select Customize.
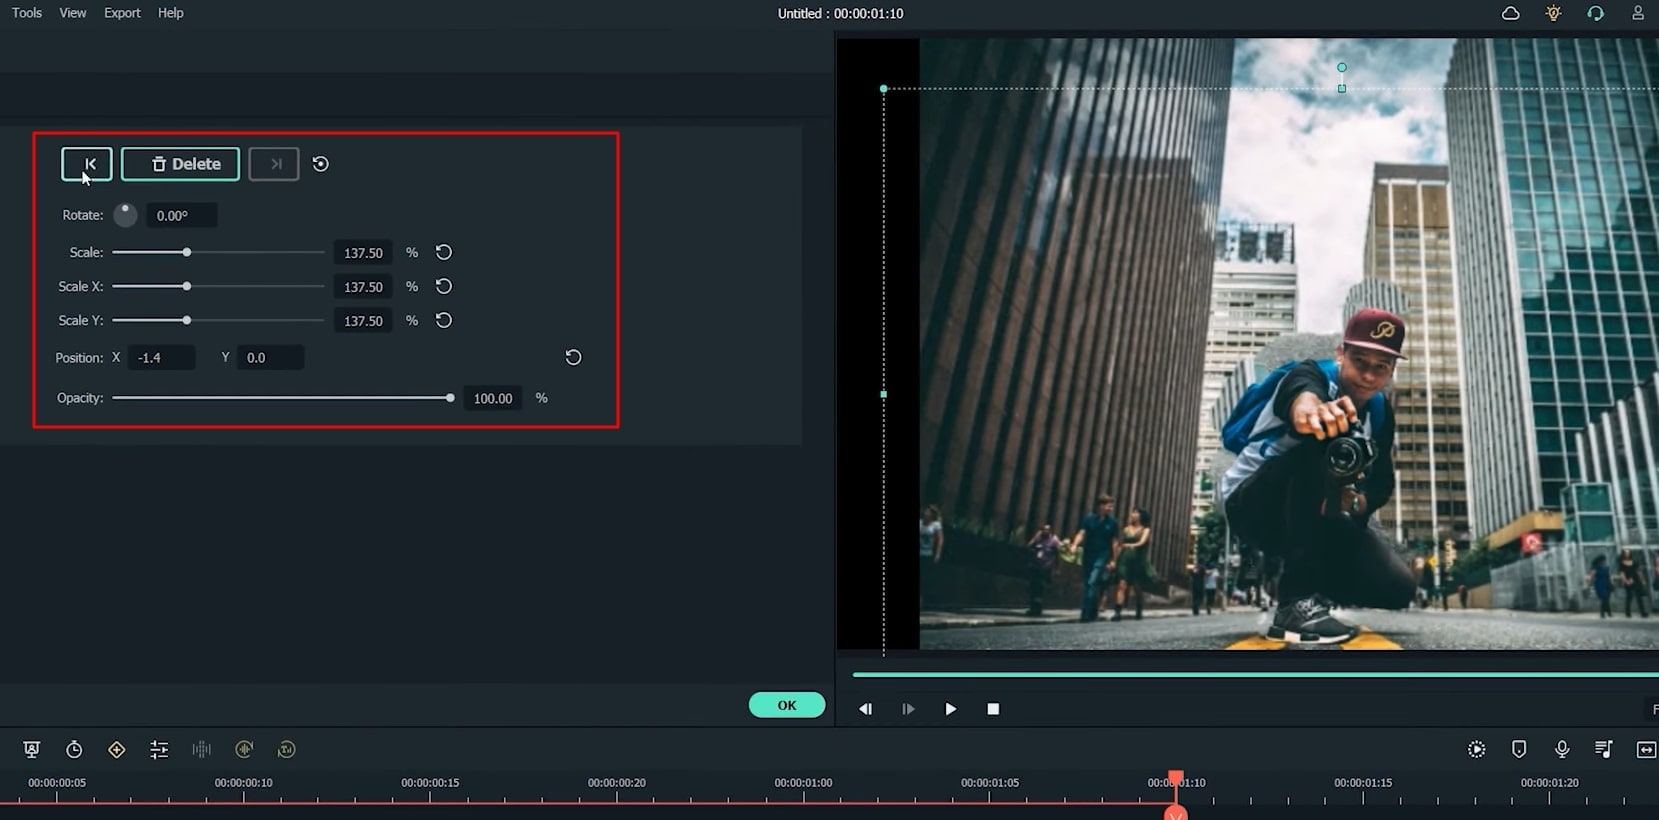
Bring the playhead to the very first frame on the timeline and click on the "Add” button to add an empty keyframe. Now move the playhead to the very last frame. Adjust your position by dragging from the preview window. Also, increase the scale of your image, and once done, click “OK” to save changes.
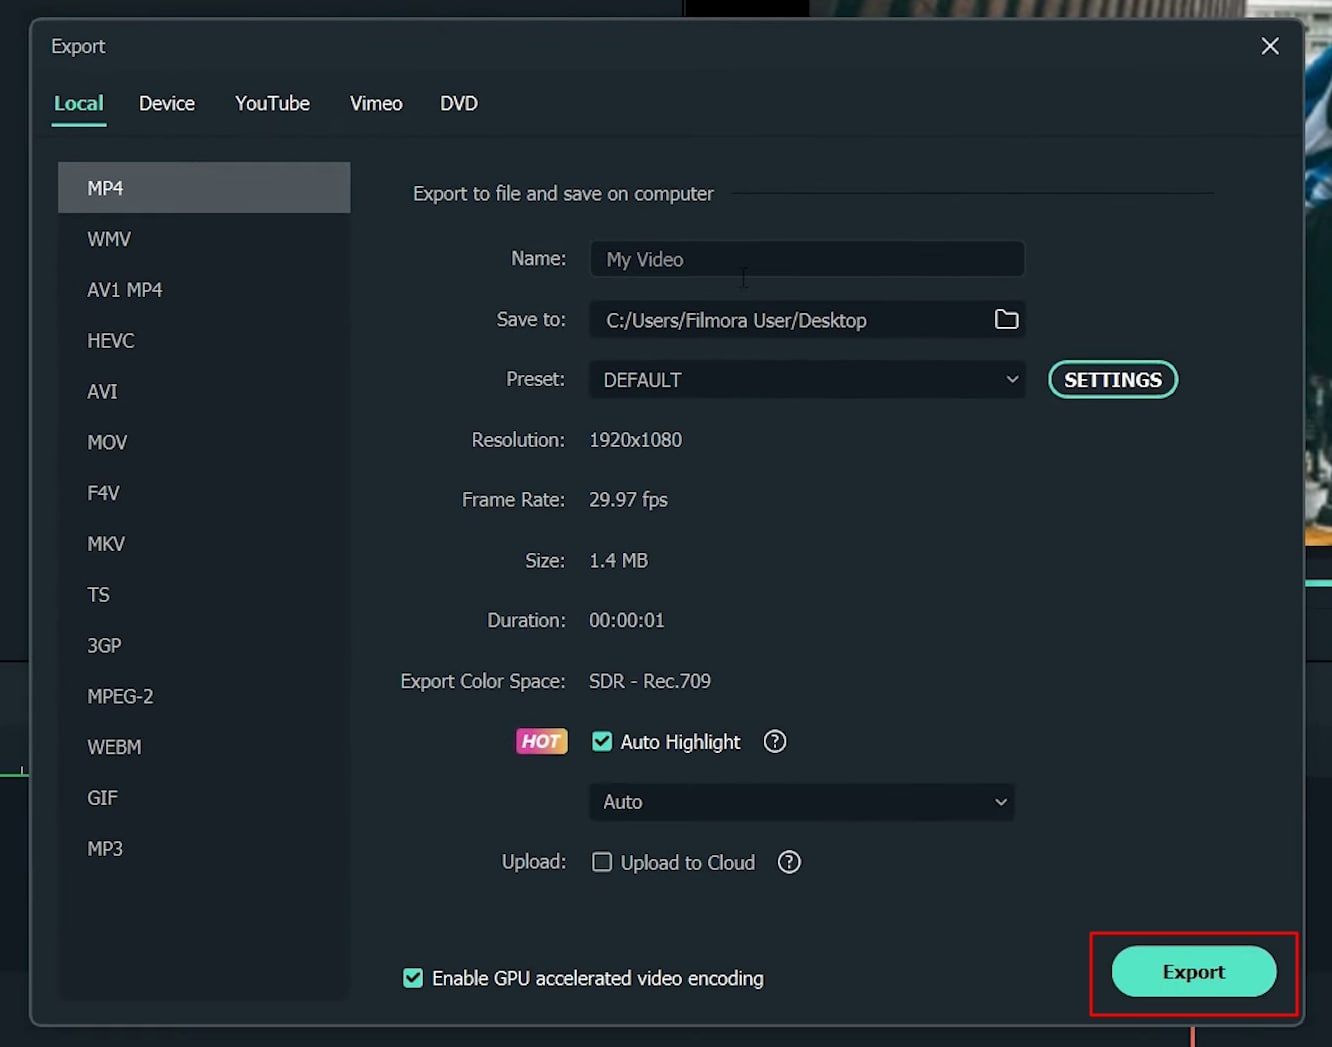
And here it is; your 3D photo effect is ready. To save or export it, simply click on the “Export” button. Put a file name, select the destination folder, and then hit Export.
Tutorial - Membuat Efek Zoom Foto 3D di Filmora
Yang perlu Anda persiapkan:
- Komputer (Windows atau macOS)
- Materi video Anda.
- Filmora pengedit video
Foto Diri Anda
Anda harus mengambil foto diri Anda sendiri. Setelah itu, Anda harus menghapus diri Anda dari background, serta menghapus background dari foto. Singkatnya, Anda memerlukan dua foto yang berbeda.
Gunakan Alat Online untuk Menghapus Background
Buka browser web dan buka "removebg.com", tempat Anda mengunggah gambar. Klik tombol "Unggah Gambar" untuk menambahkan file gambar Anda. Alat ini akan menghapus background dan mendownload gambar dengan mengeklik tombol "Download". Jika Anda memiliki kredit, Anda juga memiliki opsi untuk mendownload dalam kualitas HD, di mana Anda hanya perlu menekan tombol "Download HD".
Gunakan Alat Online untuk Menghapus Objek Dari Gambar
Setelah ini, Anda diminta untuk membuka "theinpaint.com", di mana Anda harus mengunggah gambar asli Anda dengan menekan tombol "Unggah Gambar". Selain itu, Anda harus memilih diri Anda sendiri dengan bantuan dari alat penanda default. Setelah itu, Anda perlu menekan tombol "Hapus" untuk menghapus diri Anda dari foto. Terakhir, download gambar yang telah diedit dengan menekan tombol "Download".

Impor Gambar di Filmora
Setelah mendownload dan menginstal Wondershare Filmora, tekan tombol “Impor” dan pilih “Impor File Media.” Kemudian impor kedua foto yang telah Anda download ke platform.
Mulai Mengedit Proyek
Setelah mengimpor gambar yang telah didownload, seret dan lepas gambar background tersebut ke timeline proyek. Setelah itu, Anda perlu menyeret dan melepas gambar Anda di bagian atas gambar background di timeline. Durasi kedua gambar akan disesuaikan dengan menyeretnya dari sisi kanan. Klik kanan pada gambar background, pilih "Crop dan Zoom", dan lanjutkan ke bagian "Pan dan Zoom".
Edit Kotak dan Induksi Animasi
Tinggalkan kotak "Mulai" dan klik kotak "Akhir", yang berwarna merah. Sesuaikan ukurannya dan seret ke bagian pojok. Terakhir, klik "OK" untuk menyimpan perubahan. Setelah ini, Anda harus melakukan klik ganda pada gambar kedua Anda, pilih "Animation", dan tekan "Sesuaikan" untuk menyesuaikan playhead di timeline proyek.
Sesuaikan Frame untuk mengatur Posisi
Arahkan playhead ke frame pertama di timeline dan klik tombol "+Add" untuk menambahkan keyframe kosong. Sekarang pindahkan playhead ke frame terakhir. Sesuaikan posisi Anda dengan menyeret dari jendela pratinjau. Sementara itu, tingkatkan skala gambar Anda, dan setelah selesai, klik tombol "OK" untuk menyimpan perubahan.
Simpan dan Ekspor Foto 3D Anda
Efek zoom foto 3D Anda siap digunakan. Untuk menyimpannya di perangkat Anda di lokasi yang diinginkan, Anda dapat mengekspornya hanya dengan mengklik tombol "Ekspor".
Membuat efek zoom foto 3D mungkin terlihat seperti pekerjaan yang sulit atau tidak dapat dilakukan oleh pemula mana pun. Dengan mengikuti tutorial ini, mendesain jenis gambar ini akan menjadi pekerjaan yang mudah. Yang harus Anda lakukan adalah mengikuti langkah-langkah yang telah disediakan, dan Anda akan dengan mudah membuat foto 3D Anda tanpa kesulitan.
Speak Your Mind